Click on a picture to view a larger version.
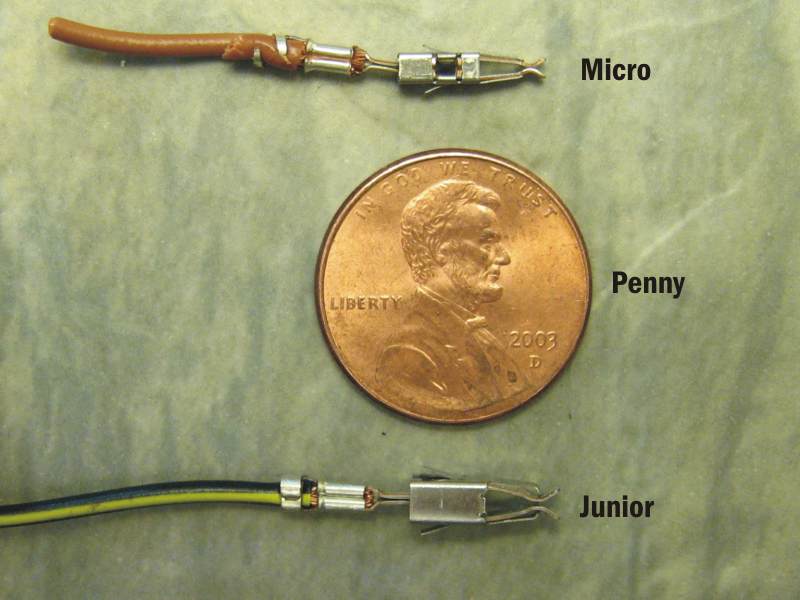 |
Shown here are the most common of the terminal ends you'll find in a VW/Audi. They are made by Tyco Electronics. The one above the penny is of the "micro" size, and the one below the penny is of the "junior" size. They are the female, also called "timers" where as the males are called "tabs". |
| The key things you need to know about a terminal end when removing it is what is holding said terminal in the housing. These use "locking springs" which are just barbs on the body of the terminal. When you have a wire out, it is good to take a look at the crimp and insulation crimp to make sure there is no cracking/breaking of the wire itself. | 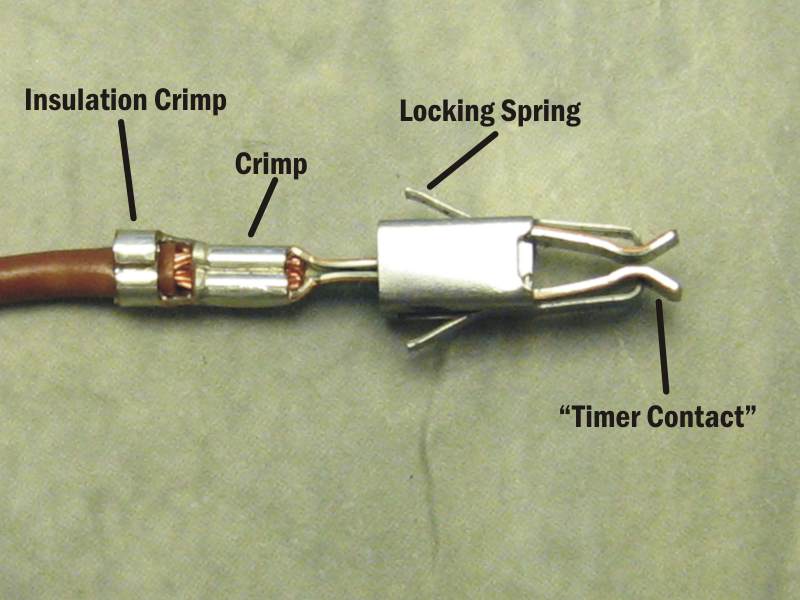 |
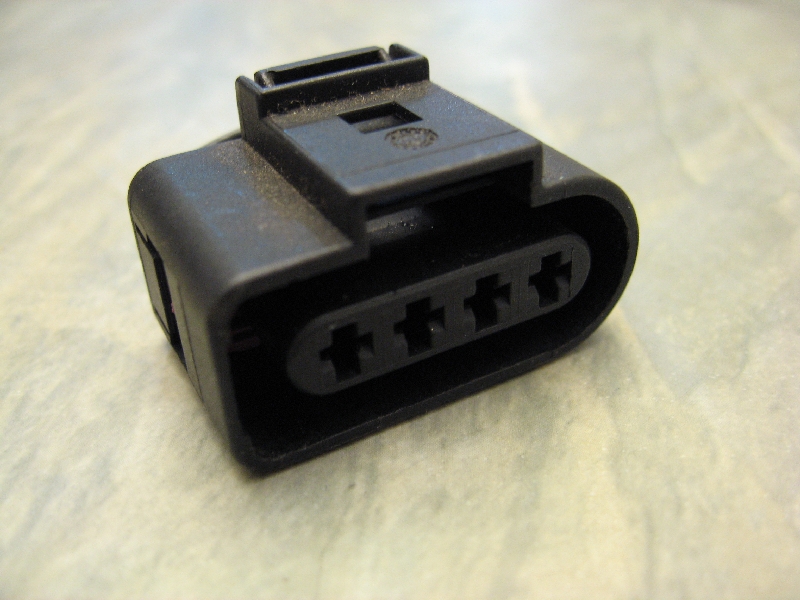 |
Here is a very typical terminal housing used in a VW. For those with the 1.8T engine, this is the one used on the coils and houses the junior size terminals (timers). |
| I've cut away the outer "D" shell of this housing and now have a cross section of where the terminal will fit. The orange piece is a gasket seal to help keep moisture and dirt out. You will find these types of gaskets on all of the exterior terminal housings, but not on the interior terminal housings. This being a coil terminal housing has the gasket, where as the terminal housing for the radio or map light inside your car would not have gaskets. You can see the 3 tracks that are in the terminal housing. So how does the timer fit into this? |  |
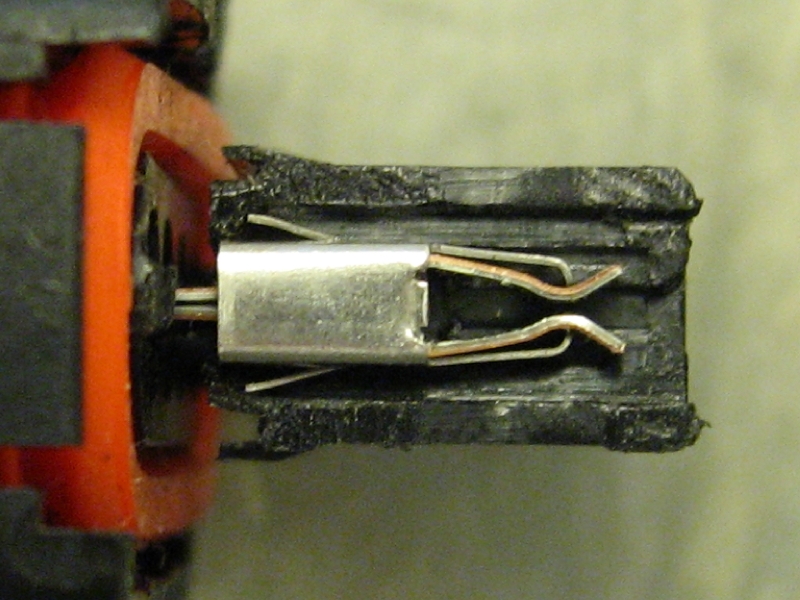 |
With a timer in the housing, you can now see how the locking springs come to rest in the outer tracks. Once fully seated, the locking springs are the first thing that keep the terminal from being pushed out. There is another track that the body of the terminal housing rest in. A final track is where the tab would fit in, you can see on the right side the tapers to help guide the tab into place. |
| When you insert a terminal release tool, it goes along the outer track that the locking springs are in. Now note that this example has been simplified a little bit for this type of terminal housing, more details further down. | 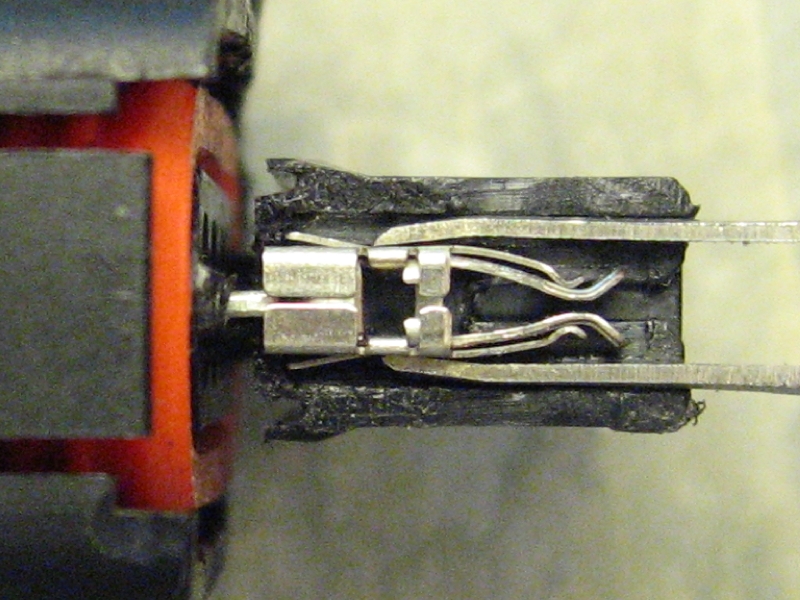 |
 |
When the terminal release tool is fully inserted, it will depress the locking springs so that they are flush with the body and will clear the outer tracks as shown. At this point the terminal can be pulled out the back of the terminal housing. It is helpful to push the wire of the terminal towards the terminal housing when doing this. In other words, try to push the wire into the terminal housing. This will push the terminal further into the terminal housing and the locking springs away for the end stops. Locking springs can dig into the end stops of their track which can cause problems. Often, you will feel a bit of a *click* when the terminal release tool is correctly inserted... but not terminals will give that *click* feeling. |
| Here is an example of what happens if a wire is pulled on before the locking springs are cleared of the end stops on the terminal housing. The locking springs will kink. When this happens, the terminal release tool will not of much use. Sadly, the only thing you can do it hope for the best. If you have a thin strong pick, you can try to drive the terminal out, or you can pull harder on the wire and HOPE that the wire holds together and pulls the terminal end out... to which end you'll find the locking springs folded over into "U" shapes and will need to be replaced. This is one of the reasons it is a good idea to try and push the wire further into the terminal housing before you insert the terminal release tool. A common mistake is to insert the terminal release tool, but the locking springs are have dug into the end stops of the terminal housing, then the wire gets pulled on and kinks the locking springs. | 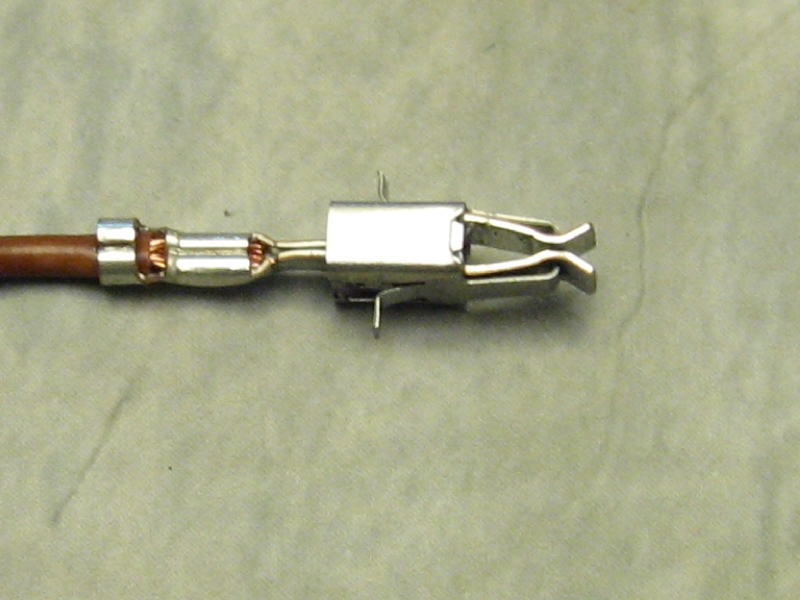 |
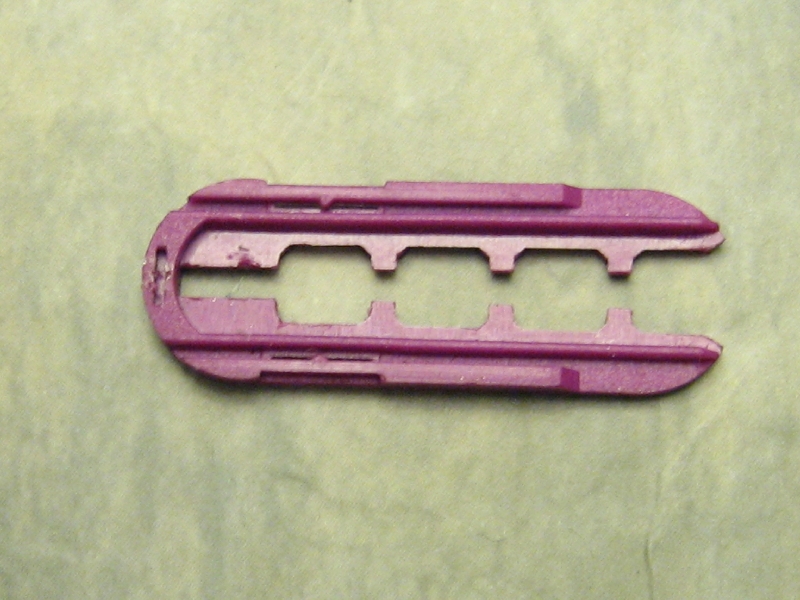 |
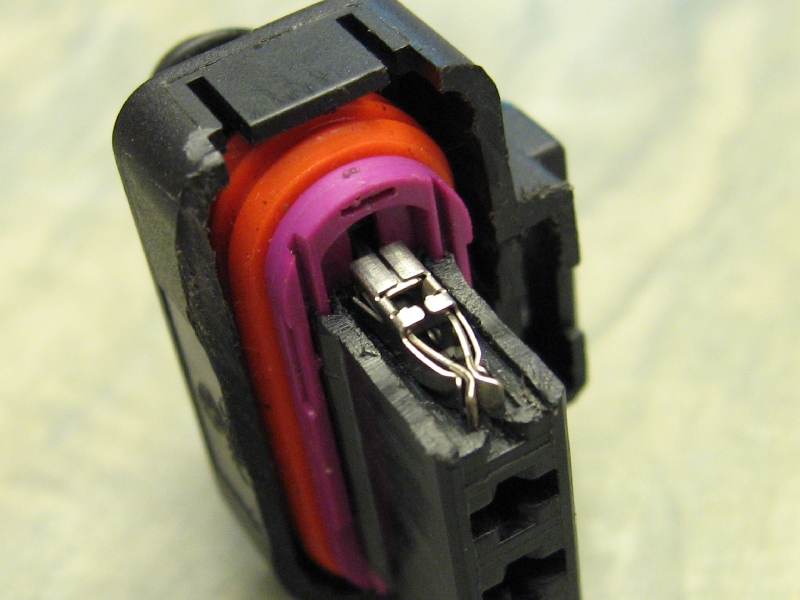
A lot of the current terminal housings will have what is known as a "secondary barrier" to help keep the terminal end from coming out of the terminal housing. They most often tend to be purple as shown here. Most of them tend to slide into a track and click into place and can be slide over a little to allow the terminal end to be removed or installed. Some of the secondary barriers are not removable from the terminal housing and will only slide/click over just a little bit to allow for terminal end removal and installation. |
| This shows the secondary barrier in the position that allows the terminal end to be removed or installed. You can see how the body of the terminal end is coming though on of the openings of the secondary barrier. | 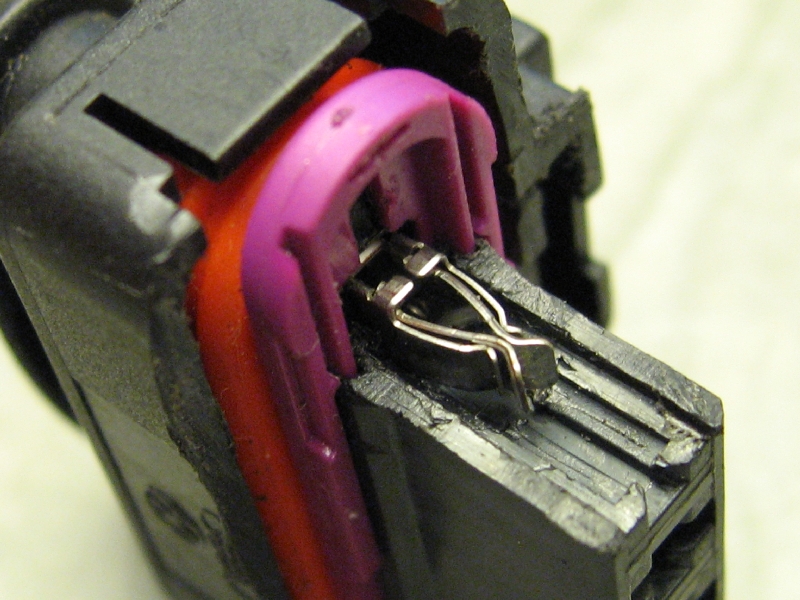 |
 |
With the terminal end fully seated into the terminal housing, the secondary barrier can be moved to it's locked position. You can now see how the secondary barrier is behind the body of the terminal end, thus the terminal end can not be pulled out the back even if the locking springs are depressed with a terminal release tool. |

Why should you send a postcard? Because it is cheap to do and as we all know, the US Post Office is funding it's Super Mutant Army Project with fees from postcards stamps. I would really like to see a Super Mutant Army deliver my mail in the near future.
Thank you.
