The Navi system has a different set of specs for the CD control than what the North American OEM radios do. North American spec CD changers for the most part will work just fine when controlled by a Navi unit. The North American spec Phatbox on the other hand doesn't work very well, if at all, on a Navi system. There were 2 different fixes for a North American spec Phatbox. The first one involves swapping a chip on the motherboard. This is a bit of a complex job to do and you won't find said chip down at Radio Shack. The second fix involved a custom wiring harness that was never put on the market. After looking at the pin out info of the custom wiring harness, I took a gamble that I could make the changes directly on the motherboard of the Phatbox. So I purchased a second unit and here are the results.
This is a two part mod. The first is putting new firmware onto the DMS cart and the second is adding jumper wires to the motherboard of the Phatbox. Again, this is not supported Phatnoise Inc, VWoA or 4130 Products. Click on the link below to download the special firmware onto your computer.
There are 3 files in that zip file:
Extract these 3 files and copy them onto the DMS cart, the "PHTSYS" folder. You will be overwriting old "firmware.pac" and "firmware.sig" files.
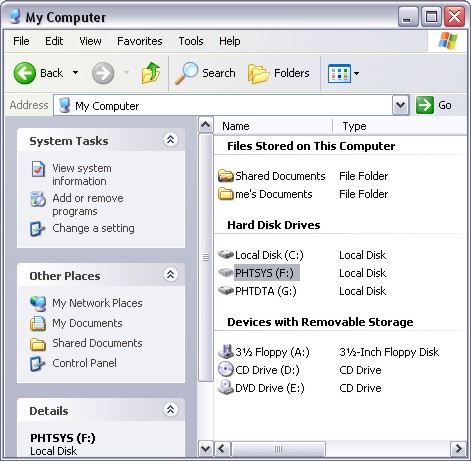
I am running sWINdle XP and had already installed all of the Phatbox software a couple of months ago from when I purchased my first Phatbox. When I plugged up the new DMS cart from the second unit, I was able to click on "My Computer" and the DMS cart showed up as a hard drive. If you don't see this, then install the software that came with the Phatbox first.
Next you will need to open up the Phatbox unit and remove the motherboard. I won't go into detail on this because if you can't do this on your own, then you shouldn't be trying mod yourself. I will tell you that there are 2 screws behind the black plastic faceplate. The black plastic faceplate is snapped onto the case, 2 points along the bottom and 2 points on the side.
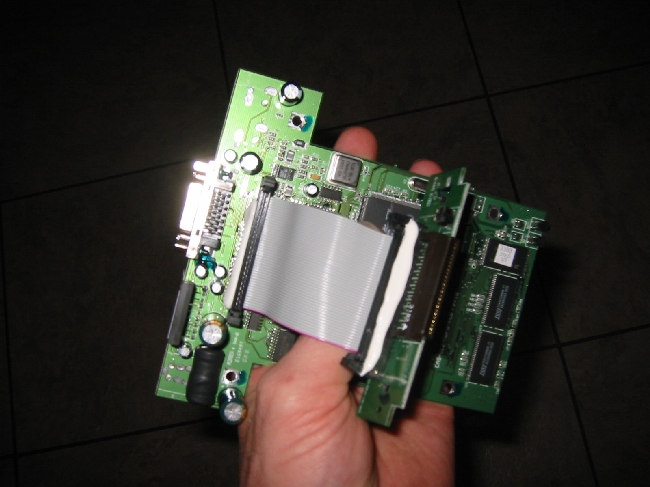
So you now have the board in hand... flip it over and look at the bottom side where the 26 pin plug is mounted to the motherboard.
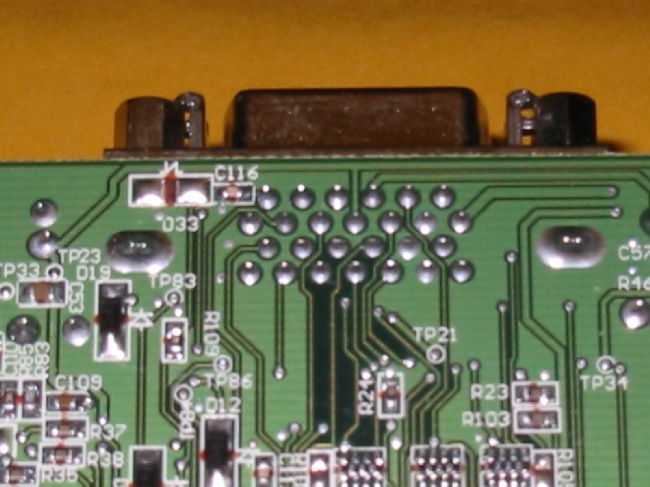
The custom wiring harness added a ground, power supply and clock signal to the Phatbox. This can all be done by running 3 jumper wires right here at the base of the 26pin plug. The following pins need to be jumped together:
The pin out on the bottom of the motherboard is as follows:
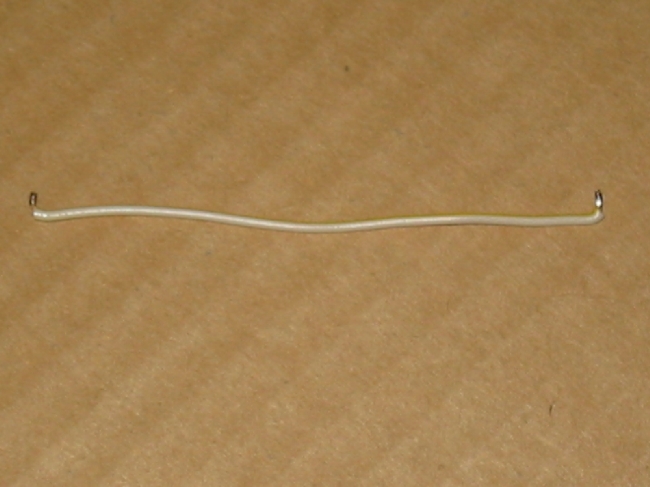
I made 3 jumper wires using about a 22 gauge wire. I cut the wire into 70 mm lengths, stripped the ends, tinned the ends then trim tip down to 2 mm and bent it 90 deg.
By tinning the wire, all you should need to do is hold the wire next to the pin and heat it up with your soldiering iron. If you do not have good soldiering skills, then you should not try this. It takes a bit of a steady hand. You don't want to try this as your first soldiering project. A good place to find geeks with soldiering skills is the vocational dept at most high schools or any kind of tech dept at a collage (think pizza).
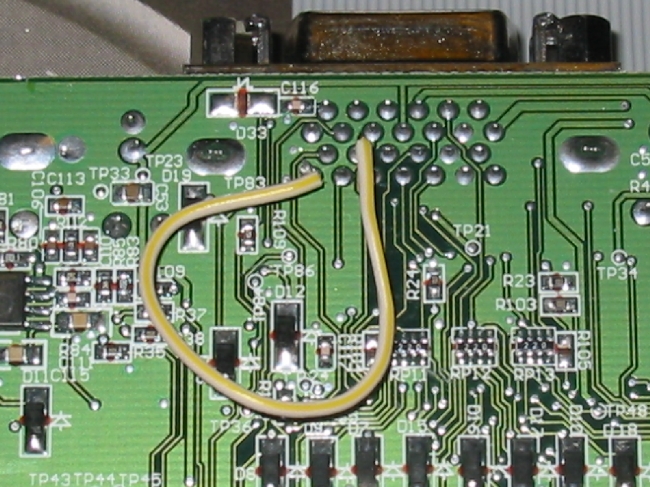
I used a pair of small needle nose pliers with a couple of rubber bands around the handles to clamp the wires and used that to keep the wires against the pins as I did the soldiering. You can see I screwed up and soldiered to pin 15 instead of 17... good thing I double checked before I plugged up the Phatbox. Once complete, you should have something like this:
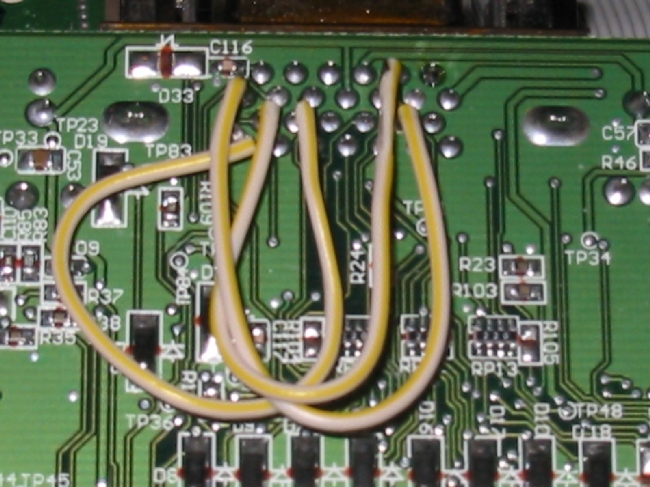
With the jumper wires bent 90 deg at the tips, the wires will stay flat along the motherboard so when you mount it back into the case they won't be mashed against the bottom. Before I put the Phatbox back into the case, I tested it first.
Plug the DMS cart up to the Phatbox, then plug the Phatbox up to your car. If you have your Navi wired up correctly, the Phatbox should power up as soon as you plug it in and then begin to load up that special firmware. The green light should blink. This takes several minutes. Once completed, both of the lights will turn off. Turn on the Navi and select the CD player, if all goes well, you now have a working Phatbox controlled by your Navi. Joy!
Will this mod work with the Navi D? I'm not really sure. My guess is yes because as I understand it, the output specs of the Navi D for the CD Changer are the same as the Navi G, and there are a lot of people with Navi D units having the same dropping/skipping issues as the Navi G crowd.
Pencilneck
740 Schenley Rd
Knoxville, TN 37923